Sep 28
Greeting Card Organizer DIY
Greeting Card Organizer DIY- A Simple How To
If you love sending snail mail like me, you’ll love this greeting card organizer DIY. A greeting card organizer is a handy way to keep all of your greeting cards together in one place. It makes finding the perfect card for any occasion easy. I find that I mail more cards now that I have everything handy and in one place.

Why I Love Sending Cards
It shouldn’t be a surprise, but I’m big on mailing handwritten cards. I love sending them for all sorts of reasons. People don’t expect cards anymore. And when they get one, it truly makes their day! And I know it makes my day on the other end of receiving cards too.
The problem is we’re so busy and life is soooo full. (You're probably even multitasking right now while reading this). So we often forget to buy that card in the first place and then that birthday or occasion sneaks up on us.
My Secret to Sending More Cards
Here’s my secret to sending more cards? Having them on hand.
And if you want to build up a collection but don’t want to store your greeting cards in a random drawer where your kids will find it and surely color all over it, then I have the perfect idea for you: a greeting card organizer DIY!

How to make a Greeting Card Organizer
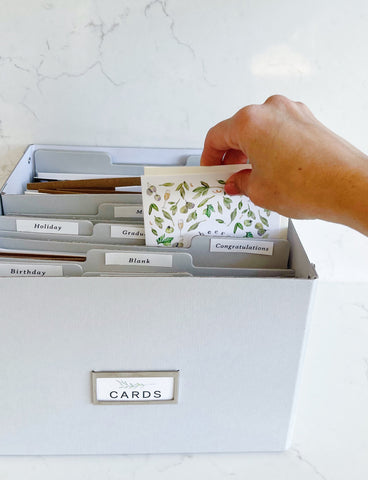
I made my greeting card organizer DIY using this container. I love it because it's a neutral color and comes with 12 divider tabs. But you could also use a shoe box if you wanted. As far as the dividers, I organized my greeting cards by occasion.
These are my categories but you can choose your own:
- Anniversary
- Baby
- Birthday
- Blank
- Congratulations
- Graduation
- Holiday
- Love
- Misc
You can handwrite on the divider tabs or use THIS FREE PRINTABLE TEMPLATE that I made just for you. Just download, print, cut and attach each label with double-sided tape or glue.

Add Your Cards + Other Tips
Next, I added greeting cards to my greeting card organizer. Dividing the cards up by category is a good way to see what you have and see what you need to stock up on. The box is a good size so there was plenty of room for all my cards to fit. In fact, I ended up only using the front section of the box for my stash.

With the back section, I plan on using it to keep some supplies like a nice pen, pretty stamps, extra envelopes, return labels, wax seals, and so on. Another idea for the back portion is to keep some of your favorite cards that you’e received and want to keep safe.
I hope you enjoyed this greeting card organizer DIY! And thanks for mailing out all those smiles.
P.S. Want to build up your stash of greeting cards? In addition to our regular stock, lucky for you, we have our “Not As Perfect As We'd Like Cards”. These are greeting cards with slight imperfections that (mostly) only I would notice. These cards, at a reduced cost, are a great way to build your stash of greeting cards so you are always ready.
P.P.S. Not at a discount, but you also might enjoy these best selling greeting cards:

Happy Birthday Cupcakes Greeting Card

You're My Favorite Adventure Greeting Card
